It has been a great time learning something which is called the knowledge.
Years of learning new things made me realise the value of patience needed in order to attain something.And it also comes in a various spectrum of ways.
So to me, this is MY WAY!
Join me in the underworld of tatting joyfulness..
When I was tatting last night, while imagining a heart-shaped tatted earring after a very rough sketch, I got half of the heart-shaped a little bit too large for an earring.It's gonna be a very bizarre big one if I completed the earring.
So I decided to make some twists and turns..still figuring what design should I make, because when I already starts to tat and make stupid mistakes I dont simply cut off the yarn and start a new one..because I just dont have the guts to insert all the beads into the yarn again.Tedious as it might not seems!
and so I decided to make something traditional..something that everybody gonna like forever..something evergreen..haha. It's the Paisley shape that piercing my mind all of a sudden last night!
The colour is actually darker than as you can see from here..this looks kinda a little bit dull I'm afraid.
and I decided to call it as....
PAISLEYMADNESS
So how is it? Am I succeeded in making an imposter Paisley..Well..why dont you take a close up picture?
The black cloth looks great either! dont you agree with me? So is the earring close to the Paisley prints on my sweater?If it is..then give me five!
I think I made it..Hmm..but I think the earring cant go with my sweater..the colour just dont blends together..
But still I was thinking whether I could make a better tatted Paisley earring, I think it should be more curvy..but anyway it does look like a teardrop isn't it? but teardrop is also a way to describe a Paisley..so I think I'm gonna stick calling it a Paisley..haha
I believe that Paisley has its own many fans in spite of its unique pattern and also its unique influence from various cultures. Printed on a various spectrum of goodies too like shawls, clothes, bags, table mats, ties and almost everything!You know what, I even ended up googling on this thing just now because I cant keep being amazed what makes it so interesting! and my guess whether this pattern originates from India is correct! but it is also said that there is also Persian influence..and the history prevails more and more as I read them..very interesting indeed!
Cant help laughing out loud when I was blog walking long ago that I found out the blogger who really fonds the Paisley..compares it to the Paramecium...HAHA..but really..it's quite similar...
I'm happy to say that I think this Paisley tatted earring is my favourite so far! It's darn stunning and I'm certain that this tatted earring would suit almost everybody..I love it and you should trust me because I'm the expertise..haha..so credits to the beauty of Paisley..and not to mention..the beauty of tatting!
Just finished tatting these gorgeous couplet piece of 'hookers' yesterday.
At first, when I took a look at it whether it is qualified to be here or not..I thought it looked slightly retarded.
But somehow when I took a second look today after showed it to mom..I was then convinced.Even more when she said the design is unique, mainly based on the combination of colour that I chose.Its just perfect for parties!
CHERISA
Although this is based on simple design, the type and colour of the bead and also the yarn colour make it looks rather stylish and versatile.What do you think?
YARN TYPE: COTTON
YARN THICKNESS (PLY): 3 & 2 PLY
COLOUR: SEAL BROWN & HOLLYWOOD CERISE PINK
STYLE: VERSATILE
the see-through beads are just darls..
Can you see the ring where I put the hook? When I was about to finish I realise it is actually would be more dramatic if I elongate both chains which is nearest to the ring so that it will look longer..and definitely..less retarded.
Honestly, I kinda hate the brown coloured yarn..because when I make a large ring, I found it very hard for me to close the ring.Sometimes I just feel like applying grease or something at the ring so that I'll never have to face the problem anymore(lol).I almost gave up when I kept breaking the yarn whilst pulling the ring..it was four times I think. As usual, what I did, is just take a break long enough to loose the 'tension' in my mind, and started all over again.
That's why whenever I choose any yarn for tatting, I'll try very hard not to use the acrylic yarn. I'll rather tat the more expensive one..which is cotton.But certain cotton yarns are also very hard to work on..for eg in this case, the brown yarn.
I dont know for sure but I'm not the one who likes to make some 'practices' before started making earrings.You know, like trying the designs out.To me, its just wasting my time, yarn, beads,money(of course) and energy.And actually most of my tatted earrings are all, spontaneously made or at least, are tatted based on a rough design.Not to mention most of the time it comes out to become so 'alienated' from the design I planned.Maybe I have to start organise myself on this thing. I know you must be saying 'no wonder all her designs are like...weird'..if you're gonna say ugly go ahead..then I will have a reason to kill you! haha no I'm just kidding...but seriously. =P
I cant believe I'm confessing this but whatever it is I'm happy to say that I'm the most crazy...lunatic...phsycotic...what more...outa mind FRIES addict mania!
If this is not enough to prove that I am...as described..I think the alibis below would prove it well.
-Just give me a whole pack of 1kg of fries, it will be all gone soon in one day.
-I hardly got 'enough' with the taste..I can eat it at least thrice a day.
more alibis?
In life, change is constant.The same principal lays on my madness.A few days ago, I made some changes.Here it is.
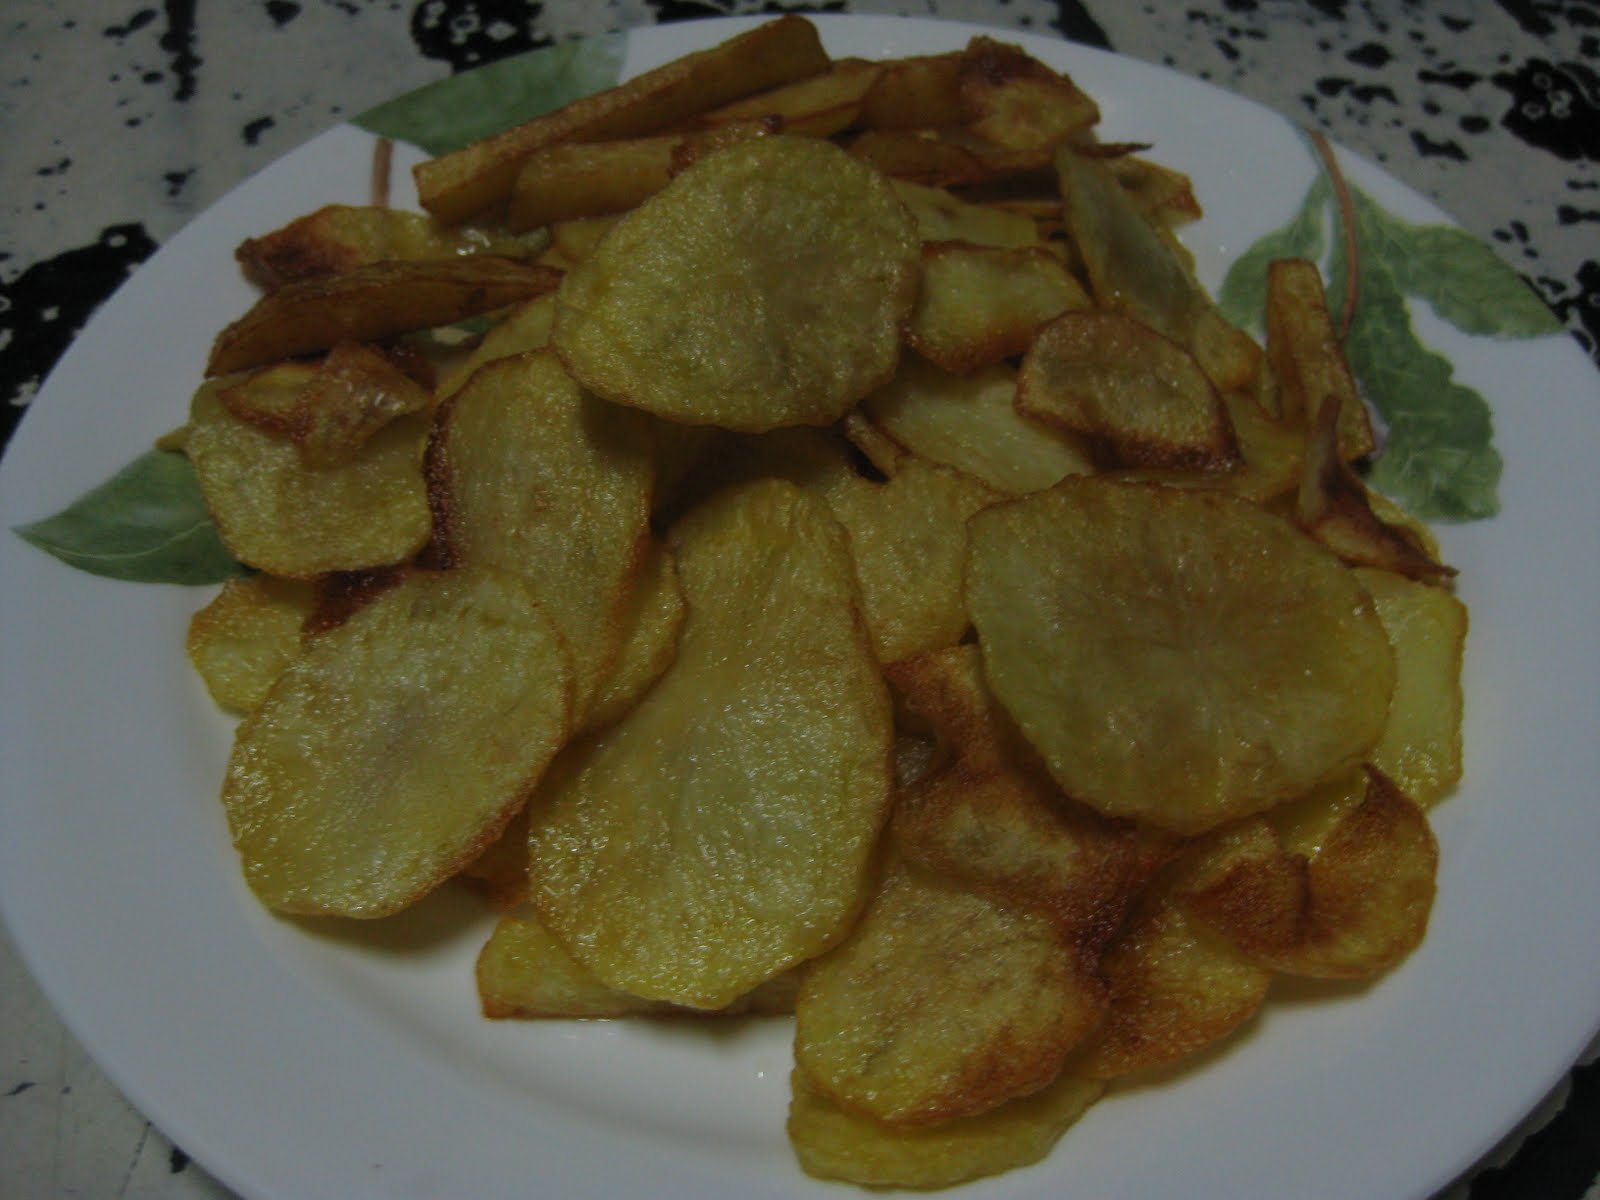
YUMMY...
I served it on the lovely plate, Corelle. It meant quite something to me. Bought the whole set when I was in Houston, Texas for a science Olympiad there last year. Corelle designs are rather simple..aren't they?
Back to the story, instead of the cliche fries, I started making potato chips. The reason is simple, crunchy but at the same time soft.
For this scrumptuous plate of chips, I used 4 potatoes. A lot isn't it? It was supposed to be 5, but there's one potato which seemed to be over riped..do you know that over riped fruits are not good for the stomache? Although potato is not a fruit, but the rule applies on it too!
During this experimental work, I also realise that I dont feel as full as if compared to when I eat french fries of the same number of potatoes that I used...
okay
the reason is, basically..Home Science..the chips are smaller in size, therefore the total surface area is much more exposed to the oil during frying, so more carbohydrate are to be broken down..
So does it mean that it is healthier to eat this way? Rather than the fries??Hmm..anyway, its a very bad habit when you have been eating this almost everyday! But I just cant resist it! and in fact nobody ever stops me!
This earring is on its way..will be called a tatted earring soon.I'm still wondering how will it turn out to be.
For a first prophecy, it would be BEADIFULL!
May i have a factory just like in Charlie and The Chocolate Factory? Oh please I'd kill to have them!
Or can I have at least a number of Oompa Loompas as my workers?
I dont think its going to be a problem for me to 'pay' them with some cocoas at the end of the month!
Oompa Loompa doing tatting..it must be so cute! haha..but i dont want all my earrings
to be done with the same design despite all of them having the similar look.
What the FLUFFY am I talking about?
okay..let the Oompa Loompa alone for just a lil while..let's say..forever? haha
I just want to nag a bit here.Can you be my ralying cry just for a sec?
How can I be a SUPER-DUPER PROLIFIC TATTER if I cant resist my deep passion playing my tin whistle everyday?
Playing this lovely musical instrument of the Irish tradition just take my mind off the world's problem for a while everytime I 'blow' it. It's just blow my mind.
Just started playing it a few months back!
I love the very unique tune in My Heart Will Go On by Celine Dion..which happens to be my favourite singer for years.
When I asked my mom years ago what kind of instrument was being played in the song..she said it was an Irish instrument.But she was'nt sure what it is.
Somehow..a couple of months ago when I was being a lot fanatic with the song itself and The Corrs.. watching their videos it ought to happen that one of them revealed my question that I'd been seeking for many years.
and it is the tin whistle. very lovely.
And I ended up making some research on the instrument..and straight away bought it without any hesitation.Despite my plan to go for a Violin class is like impossible for the moment, but its worthwhile to get the Tinwhistle..for a reasonable price, and me myself dont mind to teach myself..because my will drives me on!
And I'm satisfied for my improvement in playing this.even will be much more delighted when I can play 'Haste to The Wedding', 'Toss the Feathers' and of course..'My Heart Will Go On' sooner or later!
I love languages! To me, it's been a piece of invisible wire cord which connects people in the world.
Blame my passion for languages for not being a SUPER-DUPER PROLIFIC TATTER(yet) because I cant help myself from stop learning this German language, Deutsch..because it's giving me so much fun!
So enough for the nagging session.
Let me introduce you with my bosom friends right now..let's do some social climbing here.
Before that, I would like to tell you this.When I was tatting last night, this thing had been hurting me. If you have a microscope now you can see that there is a tiny mini spot of scar at my pointy finger..guess who did this to me? who might have been dare to do this to me????
haha
It's my favourite Bobbin Shuttle who did the crime. Nevermind, I already punish it with a moment of curfew in the box so dont worry.
But it's still gonna be my favourite tatting shuttle.
Yes..this is what I use to tat.. and it is called a shuttle..
I dont know why it is called so..I know you will imagine sth like a real shuttle..the NASA Columbia shuttle. Oooppssssss!
but it's quite logical to compare this tatting shuttle to my unfortunate incident last night..because i learn that 'failure is not an option'.
Do you know why it is my favourite?
It is different from the normal tatting shuttle because it has the bobbin in it which is removable..which is more convinient when I have to tat using different colours of yarn.
Can you see the hook there? It was just genious to invent something like that to the shuttle right?.It helps a lot when I'm applying the miniature beads to the tatted earrings. But sometimes it is rather irritating when the hook got stucked to the very delicate cotton yarn and spoil them.
Well in fact the hook which made me had that scar! Urghh..it hurts a lot when I was washing the
dishes today.. nevertheless..it's not gonna stop me from making more earrings.Again.. FAILURE IS NOT AN OPTION!
See..I told you..failure is not an option..just a choice(erk????)
And yessss.. this is the usual ones..the normal tatting shuttle. I love this type as well actually..it is Clover.but Hey Hey Hey..I didnt get my screen name from this so dont get me wrong. Just a coincidence.
It is tiny, easy to handle when I only use one colour of the yarn when I tat.Furthermore, it could role more yarn than the bobbin shuttle do! So basically every type of tatting shuttle has its own specialties.
But wait... this isn't mean that I'm not producing more tatted earrings..in fact I'm trying to be a SUPER-DUPER PROLIFIC TATTER! Its just that I want to share with you what I like to do during my leisure time besides tatting..because I'm not a machine! lol
Ok..I think this nagging session already help me to loose about 0.1 grams of cholesterol and 10000kwatt of stressfulness now..(wwwhat?)
Credits to my creativity part of brain to finally made me finished tatting my another five earrings.
This time if you realise the designs i made for the earrings are less formal so that it'll go with any occasions..(except funeral lol)
So here it is..
ORBITA
YARN TYPE: COTTON
YARN THICKNESS (PLY): 3 PLY
COLOUR: BLACK + ECRU
STYLE: DISCO GIRL
WAULAH
YARN TYPE: COTTON
YARN THICKNES (PLY): 3 PLY
COLOUR: CARMINE RED + ROSEWOOD RED
STLE: OUTRAGEOUS
This design was inspired by the unique Wau Bulan which is one of the
Malaysian prides.
In case if you dont know what is a Wau
Bulan, it is actually an intricately designed Malaysian moon-kite
(normally with floral motifs) that is traditionally flown by men in the
Malaysian
state of Kelantan. It's one of Malaysia's national symbols.
The reverse side of the fifty-cent coin of Malaysia (1989 series)
features an intricately-decorated Wau Bulan with a hummer on top.
The logo of Malaysia Airlines (MAS) is also based on
this kite.
Below is the one example of Wau Bulan.. artistic piece of workmanship isn't it?
The beads which I used for Lipaniata is the circular bead which gives it a softer touch and look. Plus with the combination of soothing colours, it'll make you look sweet and simply fabulous.
LIPANIATO
YARN TYPE: ACRYLIC + COTTON
YARN THICKNESS (PLY): 3 PLY
COLOUR: BLACK + WHITE
STYLE: DANGEROUS
Lipaniato is decorated with cylindrical bead which gives an impact of vitality which is way different from Lipaniata because of the different impression it reflexes just as the Malay saying goes 'sama tapi tak serupa'.
Ok then............... Teeeeeeeeeeeeeeeeeesssssssssssssssssssssssss!!
I know you must have been wondering how does tatted earring looks like for heaven's sake for a very long time, right from the start after you read my first post. And now all those quizzical wonders are about to be terminated by this post . Finally I'm ready to show it to you.
I'm just entirely happy here (and also a scintilla of nervousness) because alas I manage to show what I have been working for earnestly as promised 'ages' ago..haha
Well I know..I know..(feeling guilty) that I'm supposed to post this much earlier but for a certain course I couldn't make it because ..yea..things happen(people say this when they plead for an apology =P) FOR A REASON and hey wait a minute I don't need to give you any possible plausible reasons after all..??!!!!
Anyway, now here it is, my first FIVE tatted earrings which are all my original designs and which I tatted nicely myself.
Before you go dead from high blood pressure by witnessing there are no any price tags or any useful information on how to purchase my exclusive artworks, I don't wanna be your murderer so let me tell you this.
This time I would LOVE you to just enjoy your own sweet time browsing around everything here..you know..just like e.g. window shopping (as for the furthest simile) to realise the aesthetic value which is all present here..but don't get me wrong, its not as though I'm not selling, but just want you to simply take a look slowly.By the way for purchasing purposes, you can refer to the message at the end.
SO THIS IS IT! (I hope this quote has not been patented or copyrighted yet lol)
My first ORIGINAL design......
BALADY FIRST
YARN: COTTON
YARN THICKNESS (PLY): 3 PLY
COLOUR:
ULTRAMARINE BLUE + ALICE BLUE
STYLE: ELEGANT
Heyyy..not BLOODY FIRST alright! I just don't really trust you ..Make sure you read it correctly...HAHA..
As the name denotes, this is probably my first design for tatted earrings after many trials of designing.
What is just so special about this design is that it gives an impression of GLAMOUR by the concoction of colours, WEALTH by the presence of beads combined with this cotton thread of quality, POWER by the way it looks and also hidden BEAUTY by the overall perfections.
It comes in the romantic combination of Ultramarine Blue and Alice Blue which is just so like a compatible soulmate.
This tatted earring of this unique design is just perfect for special occasions such as feasts, banquets, prom nights, or a romantic candlelight dinner perhaps??
Have you watched Alice In Wonderland? I just cant help remembering the evil queen with her big heart shaped head who wants everything in the world to be in red!...but no I assure you this design was not inspired upon her even in the slightest.
Why Red Ruly? Isn't it has anything to do with..the just-now-already-mentioned Red Queen who rules like mad? Or is it because it is gonna give you some kind of power once you hook it at your pierced cartilaged ears?
Truly I don't know it myself(what am I talking about?) XD but frankly this design reflexes my state of mind when I tat this earring which I myself would say a weird design because its really weird...(made by a weirdo as well) to me..honestly..but I just love it. Why?? Because based on the design, it will signify you as a FLEXIBLE person by its colour and shows that you will always be ready for any challenges which makes you powerful and rules at the end!
It comes in Lust Red which is obviously accentuating!
So for this design I opine you to wear it on ..during almost all kinds of event!
It is suitable for pretty much anything from hang-outs, casualties, just anything you wish! But not for formal events such as walk-in interviews and such..
The most one thing I like about this earring is that since it is tatted using acrylic thread, it is more thicker and firmer than those other earrings which is tatted using cotton thread. For this time Red Ruly is the only acrylic-based earring, and yea of course it took me a lower cost buying the material, but to tat using acrylic thread was very a challeng to my patience.
If you want to 'bloom' like a sunshine, highly conscious to make people notice you, then you just go for this design. Inspired by beautiful flowers terrorising the Earth this earring is tatted with a multiply of work which is slightly different from other earrings in order to enhance and produce a lovely art piece of this kind.
Trendy and at the same time environmental-friendly(lol) looking is just suitable for outings, vacations, shopping spree and such.
What I like about this tatted earring design the most is that this kind of design you can transform it into a funkier look by just carefully making some twists to the earrings.
While this earring is extremely flexible, let me give you some highlights and tips:
To get the original design (as it is really transformable), just place it in a thick book so that the pressure will give its normal design back which is just flat. Then you’ll get a………………. pressed sunflower! Haha..just kidding~
For a funkier look, carefully just make some effort to shape the earring, into the way you desired.
As it looks, it comes in Orange(web) colour which is just so admirable!
What do you think dear readers when you first see this???
It looks just like a pair of beautiful peacocks isn’t it? Just that it only comes in purple colour..ahah!
As you can see it is full tatted-based design..no beads are added which means bead-free, bird-free, pet-free..and the list continues..
With only tatted cotton thread it is very light you’ll feel as if you’re not putting anything at all!
This cuty beauty tatted earring is most suitable for ‘under the roof’ occasions..why?still not getting it? What I mean is formal/special occasions and such..given that not the ones with open air concept. You are going to find out why I’m saying so when you already wear it..hah..no, I’m just going to tell you clearly. Honestly it’s actually very light and you don’t one the wind to blow it and make you look like a flag unless you are okay with it.
You wanna be a star? Well stupid question, really…who don’t ?ok..dont answer me.
These identical twins are so cute it is tatted nicely and ‘festooned’ with good quality Japan beads which are in glass-white colour.
As you can see these pair of earrings are tatted using two bright colours of cotton thread which are Hollywood Cerise Pink and Black which made up a perfect match.
From this self-designed and tatted earring I believe I have a pretty good sense of classy fashion so that’s why I’m assuring you that Staronty is suitable for almost all occasions! But of course except for a funeral session although I admit the gloomy black colour is there..ahah!
And you know what? For those who are in or gonna be in the universities and such Staronty is just perfect for your ‘schooling’ activity! Yea..for lectures and such.Just flick your hair (just like you always do when you want ‘his’ attention lol) whenever you wish and people will start labeling you as a fashionista ..complimenting you here and then as though you are some kind of gifted or what..=B
So basically this design is all suitable for casual time~
So how do you find it? Feel free to ask if you have any inquiries. Send your inquiries to my email address for those who are interested.
Hey everybody! i know this kinda weird because i'm supposed to talk about tatting stuff here, but i couldn't stop my internal will to share with all of you readers for this simple techniques of sewing beads on fabrics!
For your information, I already have my tatted earrings done.I just cant wait to post it in here!
Back to square one, some of you might already know bout this little thing, in fact i do even before i joined the class 3 days ago.This thing might be a piece of cake for some of you,for you already get used to it.But maybe there are certain techniques that you are lacking of in this art.I dont promise great techniques, but for a first timer this is an ideal start for you to pack your leisure time sewing beads, with the right way,and you'll realise theres more to it!
Joining the sewing beads class session for 4 hours which i thought should be 8(it really should be!,but nevermind) really had providing me a good practice to learn 8 kinds of motives.These motives are catogorised as Level 1.In this class, i had the chance to learn only one from three levels.So maybe if i have the chance for taking the class again, i'll go for it.Eventhough they charged me RM10.00, my mom said eventhough it pays you money..it is actually something MONEY CANNOT BUY.There's truth in it right?Anyway,its a good idea to join in such classes before i started getting busy.
Here, i'll try to explain to you as clearly as i can.I swear i never write instructional writings before and i'm quite afraid if my instructions are not clear enough. I find it quite hard to explain something in writing especially in this kind of thing(which i thought is easy but i was wrong), something which is supposed to be taught infront of you in live action...just like Teppanyaki..lol..But well i'll try my best. =)
As i have just mentioned above, i learnt LEVEL 1 technique, which composed of eight motives altogether which are:
1. JAHIT ULAT-ULAT
2. JAHIT TABUR
3. JAHIT PIRAMID
4. JAHIT PINTAL
5. JAHIT SERONG
6. JAHIT ARROW
7. JAHIT OMBAK
8. JAHIT X-RAY
Since the class was taught in Malay, i choose to let the names the way they are which are in Malay although i'm explaining in English because i'm sure its not gonna harm your understanding..
First I would like to give you a few facts and tips whenever you wish to start sewing beads.
• The needle that you are going to use is N0:11....so that it could go through the beads.
• I suggest you to get beads, which are the ones from Japan as they are known for its quality.You hardly find irregular beads got mixed together in the same packet, or 'impurity' beads from different kind of bead in another packet of beads..I witness its quality when mom hit a cylindrical bead using a hammer..and it didnt crash!plus it is also very cheap!
• For the fabric which has been sewn with beads, dry clean or just by rinsing the fabric would be enough.You surely wouldn't wish to see the beads falling off after all your hARTwork(not to mention artwork or hardwork.. =B)
• For a nice touch, use nylon thread instead of cotton thread.
AND THIS IS THE HOTTEST TIP: WHENEVER IT HAPPENS THAT YOU SEW THE BEADS WRONGLY, FOR EXAMPLE YOU TOOK THE WRONG BEADS, DONT JUST GIVE UP AND GIVE IT AN END TO YOUR WORK BY CUTTING THE THREAD OFF AND START ALL OVER AGAIN!
Just simply create a tension on the fabric by stretching the fabric, and gently get the needle out of the fabric from the other side by pulling the thread.Just as simple as that.
I'll start with the first one..lets have a look at my first trial...
JAHIT ULAT-ULAT
Just ignore the white thread which comes 'out of the blue'..haha
You must have seen this motive sewn in clothes normally on traditional attires.. and also for tote bags as well.
This motive just require easy steps to make it.
1. make a circle on the fabric u would like to sew the beads on.If the circle is big than it will require you more work to finish it up..for small circle, vice versa.
2. As usual, after you already have the needle and thread prepared, insert the needle into the fabric and make sure it comes out at the centre of the circle you have drawn.
3. Then insert 3 round beads of any colour you like(for this motive the round beads are the best to be used) into the needle.
4. Insert the needle back at the same spot when it first comes out of the circle.
5. Insert the needle up again into the fabric by making sure it is near to the one you just make.and continue step 1-4 until you complete the entire circle!
TIT BIT TIPS FOR THIS FIRST MOTIVE
• For training purposes, you may just use the usual sewing thread.Otherwise, for a serious work, you should use a nylon thread for it gives a beautiful look on your work and the effects are more impressive!
• For the beads, I suggest you to use the round beads because it gives a nicer touch on the motive rather than the cylindrical beads because the round beads are more suitable.
• Ensure the beads you are sewing are really close to each other.
• Make sure the thread you are using are the same colour as the beads.Unless for creativity purposes, there's just no limit to it!
JAHIT TABUR
As you can see, i tried to do it in 2 ways.One a little bit far from each other, another way I sew it in groups.Well the way you sew it is up to you, as you wish..just SPRINKLE!
1. As usual, insert the needle into the fabric, then insert only one cylindrical bead, then park the needle back into the fabric at the end of the last bead.
2. Since it is only a one-bead-work-at-a-time, the way you want it to be sewn on the fabric is up to you.If you are sewing it far away from each other,make sure the distance between it is the same, or otherwise it will look ugly.But it if you are sewing it very close to each other,make sure it is so all throughout your work of the motive.
TIT BIT TIPS FOR THE SECOND MOTIVE
Usually, for fabrics which are sewn with beads, it is not advisable to wash with the washing machine as it will spoil the beads sewn.Because why?It is because the beads are not strongly sewn on the fabric.So here's a technique for a stronger and durable sewn beads.
• After you have done with the first bead,(after you already get the needle again at the back of the fabric),insert the needle back to the first point you first sewn at the begining, and then, so it back again at the same spot to the back.You can refer to the below diagram for better understanding:
1*(BEAD)*2
3*
4*
*representing the point of inserting
JAHIT PIRAMID
Before i write the steps, I just want you to ignore the number of beads in the rows because it happened that I got it wrongly.Just follow the steps below.But as you can see this JAHIT PIRAMID motive looks kinda curvy at the base.Actually when you are sewing this you just dont put it that way, you just sew it horizontally straight with enough thread tension.The curve appear naturally when your pyramid is done...it kinda happens just like that.
1. Insert 8 round beads into the needle, lay the beads horizontally and then park the needle at the very end of the last bead.
2. Insert the needle up into the fabric, making sure it comes out at about the centre of the eighth bead.But note this:not under the bead,but above the eighth bead at the centre lining)
3. Insert another 6 round beads into the needle, and again park the needle at the very end of the last bead.
4. Again,insert the needle up in to the fabric, making sure it comes out at the centre of the last bead above it.
5. continue the same steps with another 4 beads,and then 2 beads, and lastly 1 bead. and you'll have your own self-built pyramd!
JAHIT PINTAL
Note this:The motive is at the upper part.
Can you see the word 'correct pintal'? To be honest i made a few mistakes at the beginning.My bad because i didnt pay attention.But then i got it right as soon as i asked the teacher back again.So the moral of the story: Always pay your attention or else the simple thing could become the hardest one.
1. Insert 7 round beads into the needle,lay the beads horizontally and park the needle at the end of the last bead.
2. Insert the needle back up into the fabric under the forth bead.Then make sure your needle comes out of the fabric trough under the beads.The needle should be below the adjacent line of beads.
3. Insert another 7 round beads into the needle, and then park the needle at the last bead by making sure you park linearly to the adjacent line of beads you first make.
4. Repeat all the steps.
TIT BIT TIPS FOR THE FORTH MOTIVE
• As a beginner you are advised to draw a straight line before started sewing the beads so that you will get the right motive done.Otherwise, it might not turn as twisted as it looks,it might just look straight and turning into other motive!
JAHIT SERONG
Note this:The motive is at the bottom.
For this motive i'm using 4 cylindrical beads as been instructed by the teacher.But you may use the number of beads between 4 to 8.
1. Draw a straight horizontal line.
2. Insert the needle up into the fabric by making sure it comes out from the straight line.Insert 4 cylindrical beads into the needle.
3. Park the needle at last bead, and about 0.4cm from the straight line.So obviously you wont get a horizontally sewn beads, in fact a diagonally sewn beads.
4. Insert the needle back up into the fabric.Make sure it comes out at the centre of the beads sewn, but between the line of beads sewn and the straight line.
5. Repeat the same steps, using different colours of beads or the same, well you decide!
TIT BIT TIPS FOR THE FIFTH MOTIVE
• For this motive, based on the steps that i learnt, I suggest you to start sewing the beads from the right.
JAHIT ARROW
Haha..it looks like a pair of crooked legs!
The steps are divided into two which is the first layer and then the second layer.
FIRST LAYER:
1. Draw a horizontal straight line.Starting from the right, insert the needle, assure that it comes right on the line.
2. Insert 3 cylindrical beads and 3 round beads into the needle.Park the needle at the end of the beads, and 0.4cm from the straight line.
3. Insert the needle back up into the fabric.Make sure it comes out at the centre of the beads sewn, but between the line of beads sewn and the straight line.
4. Repeat the steps, as many as you like.
SECOND LAYER
1. Starting from the last line of beads,insert the needle way up through about the same spot you just inserted before.
2. Insert 3 round beads and then 3 cylindrical beads into the needle.Park the needle at the very of the last bead.MAKE SURE YOU PARK IT DIAGONALLY, SO THAT YOU COULD SEE IT JUST LIKE A SLEEPING 'A'.
3. Insert the needle back into the end of next line of beads at the first layer.Repeat step 2.Finish the whole layer.
JAHIT OMBAK
This is mom's favourite.
For this motive you only need 2 colours, otherwise you may not manage to see the effect.
These steps are also divided into two layers
FIRST LAYER
1. Draw a horizontal straight line.Insert the needle up into the fabric,and as usual make sure it comes out on the line.
2. Insert 4 cylindrical beads and 4 round beads into the needle.make sure the colour between the cylindrical and round beads are different.Park the needle at the very end of the beads, and also 0.4cm from the line.
3. Insert the needle back into the fabric, make it comes out up into the fabric at the centre but below the line of beads.
4. Repeat step 2,then 3 and so on, as long as you like.Then finish it by putting a knot at the back.
SECOND LAYER
1. Starting from the first line of beads you just make, insert the needle on top pf the line of beads, between the forth and fifth beads.
2. Insert 4 round beads and 4 cylindrical beads following the respective colour of beads you use during the first layer.
3. Park the needle at the very end of the bead, making sure it is diagonally parked, as if a sleeping 'A'.
4. Repeat the same steps, as if giving a partner for each layer.Than you'll get a beautifully sewn beaded waves on the fabric!
JAHIT X-RAY
1. (starting from the right)As usual, after the needle has been inserted up into the fabric, insert 7 round beads into the needle.Lay it vertically on the fabric.
2. This time, park the needle under the fourth bead.You will get a bridge-like line of beads.Make sure your needle doesnt go between the strands of thread, because it gonna turns out to be an alien motive.
3. Insert the needle back up into the fabric and make it comes out about 0.3cm beside the first line of beads.
4. Insert the same 7 round beads into the needle.Drive the needle under the adjacent line of beads and up again and park it next to the adjacent line of beads, provided it is the same level as the adjacent one(its partner).Then you have your first 'X'.
5. Repeat all the steps to get more!
I hope you could go with these haywired instuctions..Josh I just need to improve my writing skills..
And I hope that you could spend sometime trying this out..its easy and..simply addicting..
All the best!
SALAM to all Muslims in the world..
And peace to every soul in planet Earth!
So..yay! this is my first blog(how many times did i say this??)
About me?hmmm..let me think for an hour..(recalling LOL)
I'm not the kinda of person who only leads a dull life because i dont want Jack to scold me!(what am i talking about?)
If you are looking for a person who likes to go for any challenges..its me! I love to try things out..(the good ones of course)
There are a lot of reasons for me blogging and one of the mains is I WANT TO MAKE SELLS!!(that's for sure...its so obvious!)..but that's just not it.
As always..in short(hate story telling..hehe)..i want to popularize tatting as popular as BRITNEY SPEARS(so cliche) and the most important aim is that i dont wanna hear anymore "wa..wa..what's that?" everytime i mention the word TATTING..so u got what i mean?